We made this refined sugar free, gluten free salted caramel pumpkin cheesecake recipe at Mum’s and oh wow it did not last long! It was a hit! So easy to make and extremely delicious!
And yes we used the real deal cheese. Because cheese is a delicious thing, especially when baked into a cake.
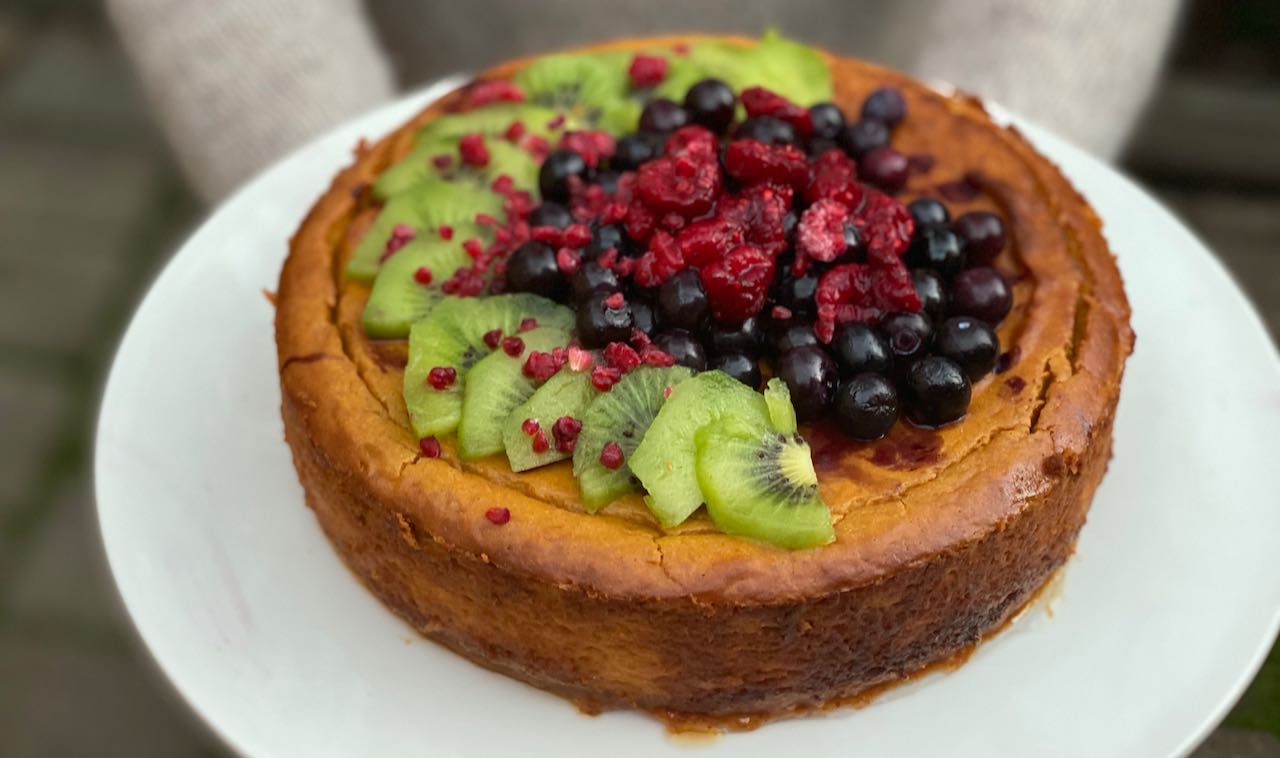
Feel free to top your delish salted caramel cheesecake with any toppings you like. We think sugar free chocolate and roasted nuts would make an excellent choice. We were in a find what fruit we have and chuck it on the cheesecake kind of mood! Hehe, all good options!
If you make the recipe please send us a pic, we’d love to see it! You can find us @themerrymakersisters on Instagram or on Facebook!
Always merrymaking,
Emma + Carla
Ps. you can now experience the MerryBody Online Yoga Pilates and Meditation Studio for 7 days at no cost! SIGN UP HERE!

Salted Caramel Pumpkin Cheesecake
STUFF YOU NEED
FOR THE BASE
- 2 1/2 cups almond meal
- 1 cup desiccated coconut
- 100 g butter softened (3.5 oz)
- 2 tbs coconut sugar
- 1 tsp 100% vanilla extract
- pinch of salt
FOR THE FILLING
- 1 1/2 cups pumpkin puree (about 500g uncooked pumpkin)
- 500 g cream cheese (1 lb)
- 1 cup dates (pureed)
- 1/2 cup coconut sugar
- 4 eggs
- 1 tsp 100% vanilla extract
- pinch of salt
NOW WHAT
- To make the date puree, place the dates in a bowl and cover with boiling water for 5 minutes. Drain and then blend until smooth. Set aside for now.
- To make pumpkin puree, boil peeled and chopped pumpkin until soft, then whiz until smooth. Allow to cool and set aside.
- Line a 20 cm (8 inch) springform cake tin and preheat oven to 170°C (340°F).
- Let's start with the base! Place all ingredients into your blender or food processor and whiz until a smooth butter forms.
- Transfer into the prepared tin and press evenly, covering the entire base. Place into the fridge for now.
- Let's get onto the filling! Quickly rinse your blender.
- Place all filling ingredients (except the eggs) into your blender and whiz on super low speed until combined.
- Slowly add one egg at a time, continuing to whiz on low speed.
- Take the base out of the fridge and carefully pour the filling on top of the base.
- Place into the oven for 60 minutes or until the top doesn't wiggle in the centre.
- Turn off the oven and slightly open the oven door for 15 minutes, allowing the cake to cool slowly.
- Take out of the oven and allow to cool completely.
- Place into the fridge for at least 2 hours or overnight before releasing the spring form, slicing and serving. OMG YUM!