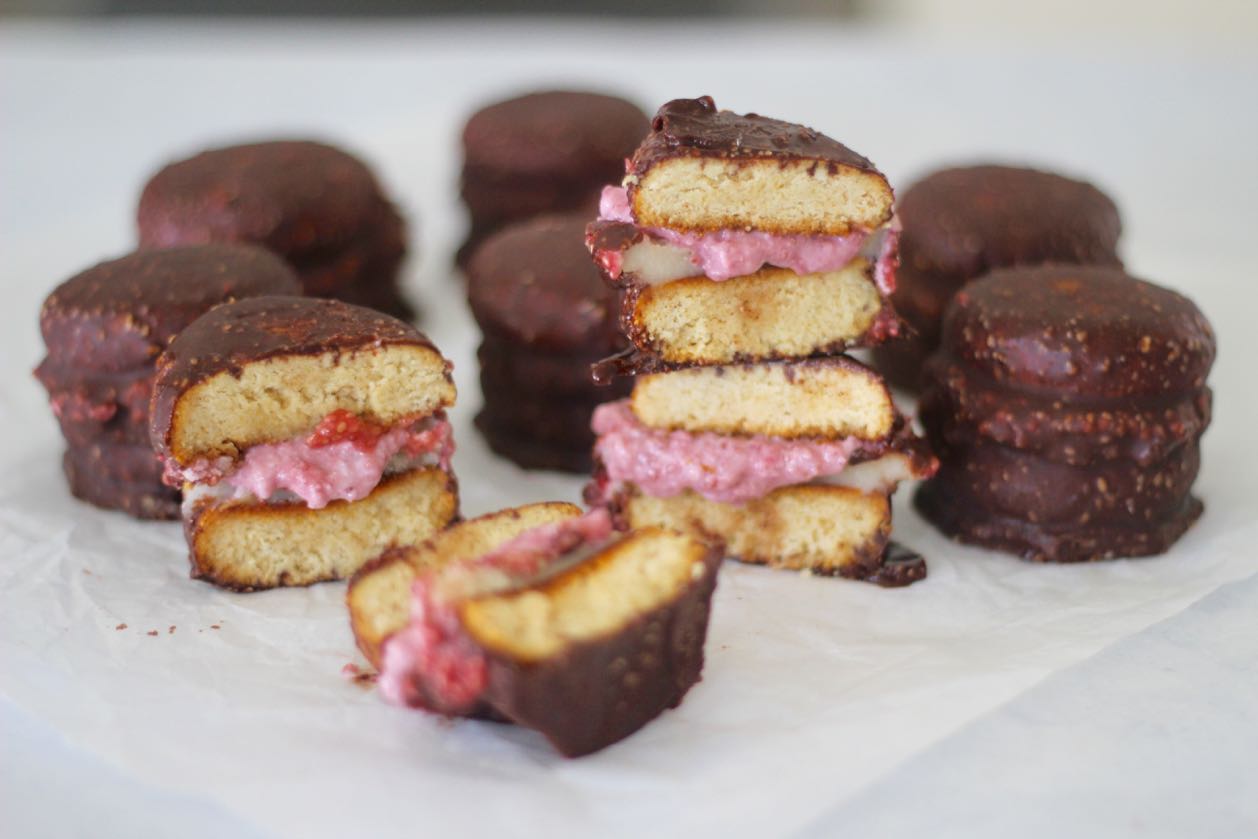
Oh yep, we went there. We baked the biscuits. We made the fillings. We sandwiched it all together and coated them in chocolate.
HELLO gluten free, sugar free and vegan wagon wheels. Yep, healthy WAGON WHEELS! All caps required because this is very VERY exciting. WE MADE HEALTHY WAGON WHEELS!
You know we’re all about healthy and easy and yum and fun.
Every step of these healthy, vegan wagon wheels is delicious. The biscuits… totally could eat them without anything else. The fillings… oh the fillings are taaaay-sty and don’t even get us started on the choccy coating. BUUUUUT when you put it all together the epic factor reaches 1 million trillion infinity.
So if you need to impress someone or win a bake-off… these will do both. Why not just make a batch for yourself and put them in the freezer for when it’s healthy wagon wheel time (aka ALL. THE. TIME.).
What is it with biscuit sandwiches that just wanna make you drool all over the place? We’re not sure… but everything double decker seems to win in all situations… especially life.
Epic sweet treats in general make life better (more merry). Have you caught the theme yet? With the Gaytime cake, the Ferreros… what will be next?! :O
If you make these delicious little treats… be sure to share a pic with #GetMerry so we can re-share our faves and spread the Merry vibes! Yew!
Always merrymaking,
Emma + Carla
P.s if you don’t know where to begin with your healthy eating… we’ve got the perfect 7 Day Meal Plan for you! And… it’s FREE! Click here to download today!

- 2 cups blanched almond meal
- 1/3 cup rice malt syrup or honey
- 1 tbs. cassava flour (or arrowroot/tapioca flour)
- 2 tsp. 100% vanilla extract
- 1/2 tsp. baking powder
- 1 cup desiccated coconut
- 1/4 cup raw cashews
- 1/4 cup coconut oil
- 2 tbs. coconut milk (canned)
- 2 tbs. rice malt syrup
- 1 tsp. 100% vanilla extract
- 1 1/2 cups strawberries
- 2 tbs. water
- 2 tbs. chia seeds
- 100 g (3 1⁄2 oz .) cacao butter
- 1⁄2 cup raw cacao powder
- 1⁄2 cup chopped hazelnuts
- 1⁄4 cup rice malt syrup or honey
- 1 tsp . 100% vanilla extract
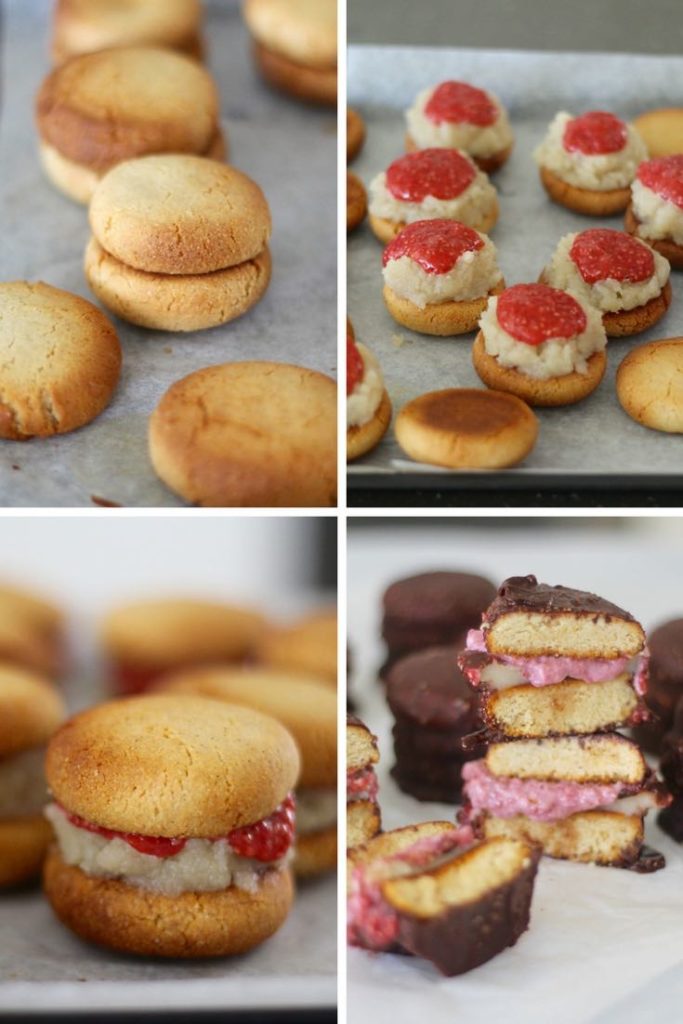
- Start with the biscuits. Preheat your oven to 180°C (350°F) and line a baking tray with baking paper.
- Mix the almond meal, cassava and baking powder together in a bowl.
- Add the rice malt syrup and vanilla and mix until a dough forms. You will need to get your hands in there, and it is sticky. It will take about 5 minutes until it comes together nicely.
- Take tablespoons of mixture and roll into a ball, place onto the tray and flatten.
- Repeat, leaving about an inch between each biscuit.
- It will make 16 biscuits.
- Place into the oven for 10-12 minutes or until golden, be careful, the cook quick! Set aside and allow to cool completely.
- Let's get onto the fillings!
- And let's be honest, it's not THAT marsh-mallowy but still epicly yum. Place all ingredients into your blender or food processor.
- Whiz until a smooth butter forms (about 3 minutes) and place into the fridge.
- Place all the ingredients into a small saucepan and heat on medium for 10 minutes, stirring.
- Mash or blend the jam until smooth and place in the fridge for at least 10 minutes.
- Now to assemble the biscuits.
- Find similar shaped pairs and place dollops of marshmallow cream on one biscuit.
- Place a dollop of jam and carefully sandwich another biscuit on top.
- Continue until all biscuits are used (it should make 8 wagon wheels) and place in the fridge to set while you make the choc coating.
- In a double boiler add the cacao butter, rice malt syrup and vanilla.
- Stir slowly until melted together.
- Add the raw cacao powder and keep stirring until the choccy mix is nice and smooth.
- Take off the heat and now it's time to dip your wheels!
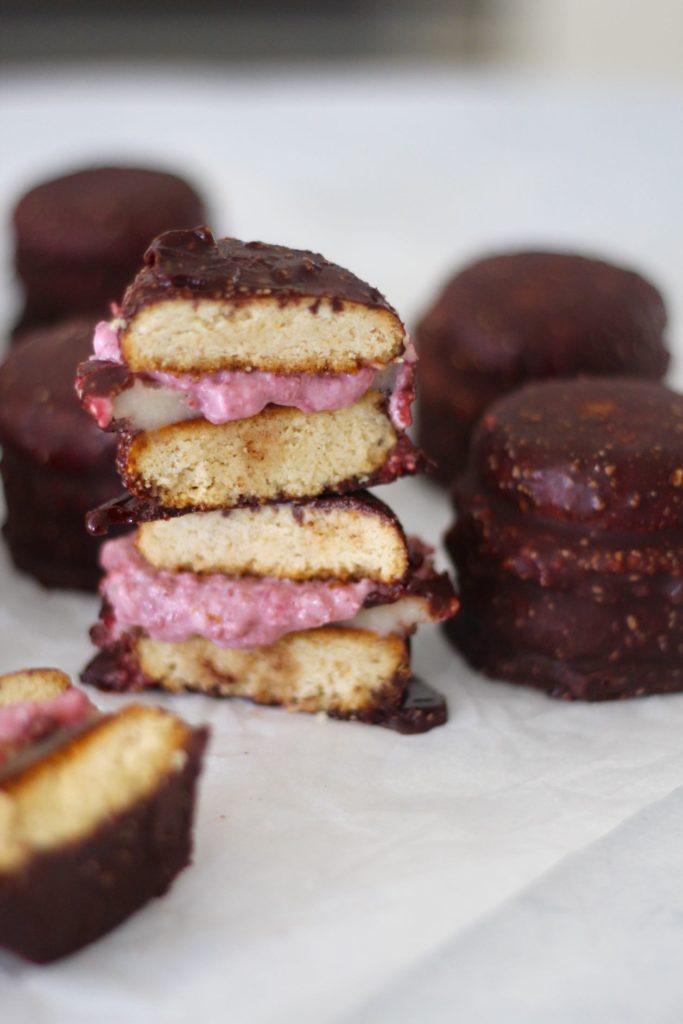
- Carefully dip each of the wagon wheels into the chocolate, you might need to roll them to cover the sides.
- Place on a place and into the freezer for 5 minutes.
- Once the first layer of chocolate has had a chance to set, coat again with the choccy topping and place into the freezer until ready to serve!
- We store these in the freezer as they thaw out really fast!
- You can skip the choccy coating to make it a quicker recipe... but omg... it's so worth it! If you want a more pink filling, mix the jam and marshmallow cream together (we did this for a few of ours!). And you'll probably have left over fillings so use it in smoothies!