Yoga is a practice with so many benefits, but did you know it’s a great way to strengthen your wrists?
Usually there is an emphasis on the other benefits because they do seem more impressive! Like the fact Yoga can be used as a practice to help improve balance, flexibility and posture.
It is also a great way to de-stress from the day and can be done at home with some basic equipment (all you need is a mat really!).
But along with all of that, it is a great way to get the muscles in your forearms, wrists and hands strong.
Those who suffer from wrist pain or carpal tunnel syndrome may find relief through Yoga. Plus, your Yoga practice can help improve wrist strength and reduce the risk of injuries within your wrists (a VERY important joint you use every single day!).
So yes, yoga can absolutely strengthen your wrists.
Why Should You Strengthen Your Wrists?
The wrist is a complex joint that is made up of bones, ligaments, and tendons.
Our wrists need to be strengthened for several reasons.
- First of all, strong wrists can help you prevent injuries and overcome pain. As you age it is so important to focus on joint health.
- It can help you with range of motion and grip strength.
- It can help reduce pain caused by repetitive motions or arthritis.
- Building wrist strength can in turn help with wrist flexibility, which can also provide relief from carpal tunnel syndrome or tennis elbow.
A good way to start strengthening your wrists is by doing simple wrist stretches before engaging in any weight bearing activity (we will share some below).
Of course, if you are having trouble doing these exercises, talk to your doctor for a referral for a physical therapist.
How to Strengthen Your Wrists with Yoga
Strengthening your wrists is vital for any Yoga practitioner, especially if you do a lot of weight bearing exercises or arm balances (example: plank pose, downward facing dog, even handstands).
If you do any kind of flow Yoga, you will most likely do some wrist strengthening work.
This is great! It means you don’t need to add anything else to your schedule to ensure you are looking after your wrists.
However, there are some exercises you can add to your day to strengthen and warm up your wrists and avoid injuries:
- Hold your arms out straight with the palms facing up for a minute or two at a time (seriously, you won’t believe how quickly you feel this movement working your muscles!). This will help improve range of motion in the wrists.
- Another exercise to strengthen the wrist is the heel of the hand exercise. Place the heel of your hand on the ground, fingers pointing up. Lift your fingers off the ground as high as you can without bending your wrist too much. Try it for 10 seconds and repeat 10 times. Switch sides.
- Simple wrist circles, extend your arms out in front of you and start to circle your wrists. Make sure you do both ways.
- Create a movement like flicking water in the air with your arms stretched in front of you, then do this with your arms reaching up high.
- Take an All 4’s position and shift your weight forward and backward.
- Stay in All 4’s and then turn one hand so your fingertips face your knees, then the other. Then turn the hand back to neutral followed by the other. Repeat this 10 times.
- Bring your pointer finger and thumb together, then swap to each other finger. Do this 3 times.
Inside MerryBody, we have a class called Wrist Love Yoga, it is an under 10 minute yoga class that warms up, stretches and strengthens your wrists. Members LOVE it.
Best Yoga Poses for Strengthening your Wrists
Now that you’ve moved through some warm up exercises, let’s talk Yoga for wrists. There are so many Yoga poses that do work the wrists and require flexible and strong wrists.
Here are just a few.
Downward Facing Dog
Down Dog is an excellent Yoga pose to strengthen your wrists because it targets all four sides of them at once – front, back, left, right.
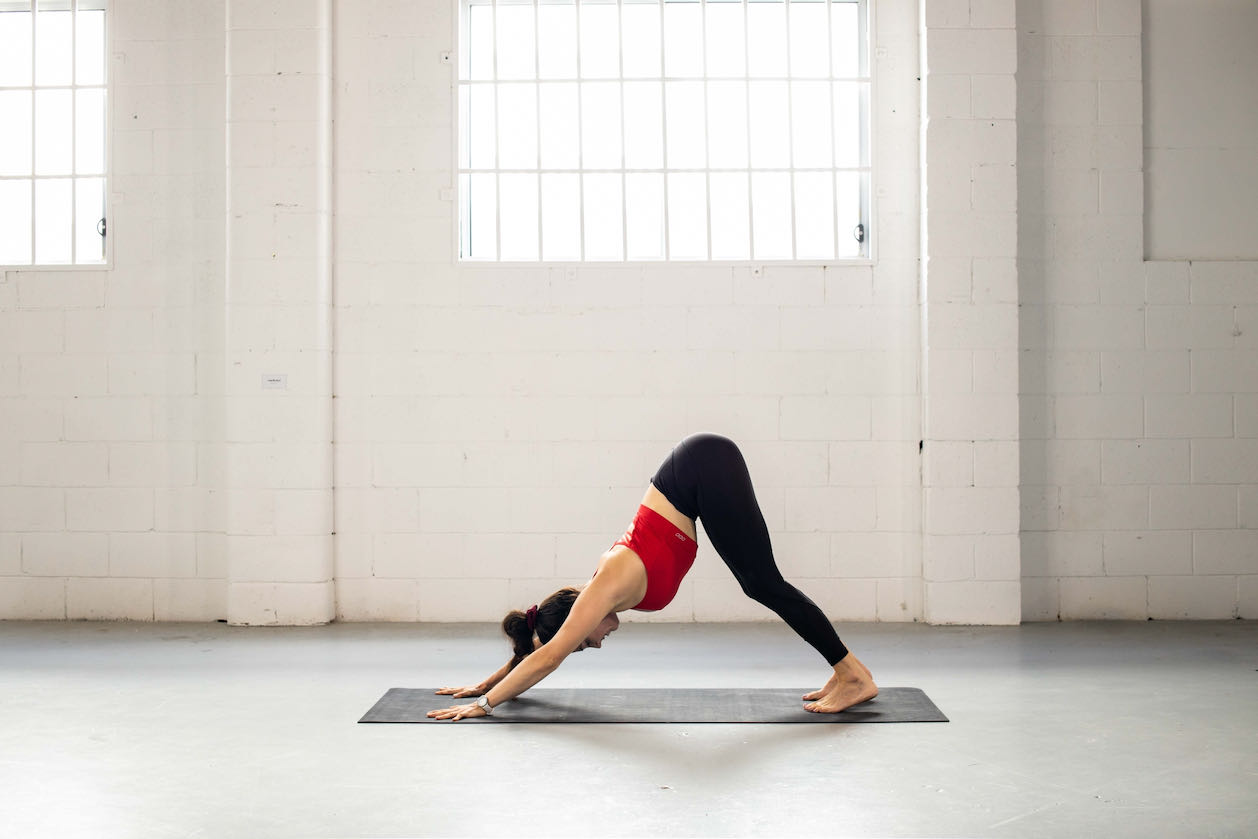
It also targets the forearms, shoulders, triceps and core (your legs will even get a workout!).
In order to safely get into Downward Facing Dog, you need to start in All 4’s Table Top with the shoulders above the wrists and hips above the knees. Tuck your toes and lift your hips skyward, lengthening the legs, forming an A shape with your body.
Practice this pose with your fingers spread wide and your weight evenly distributed.
Upward Facing Dog
Up Dog is another common Yoga pose that strengthens the wrists, plus the spine and arms.
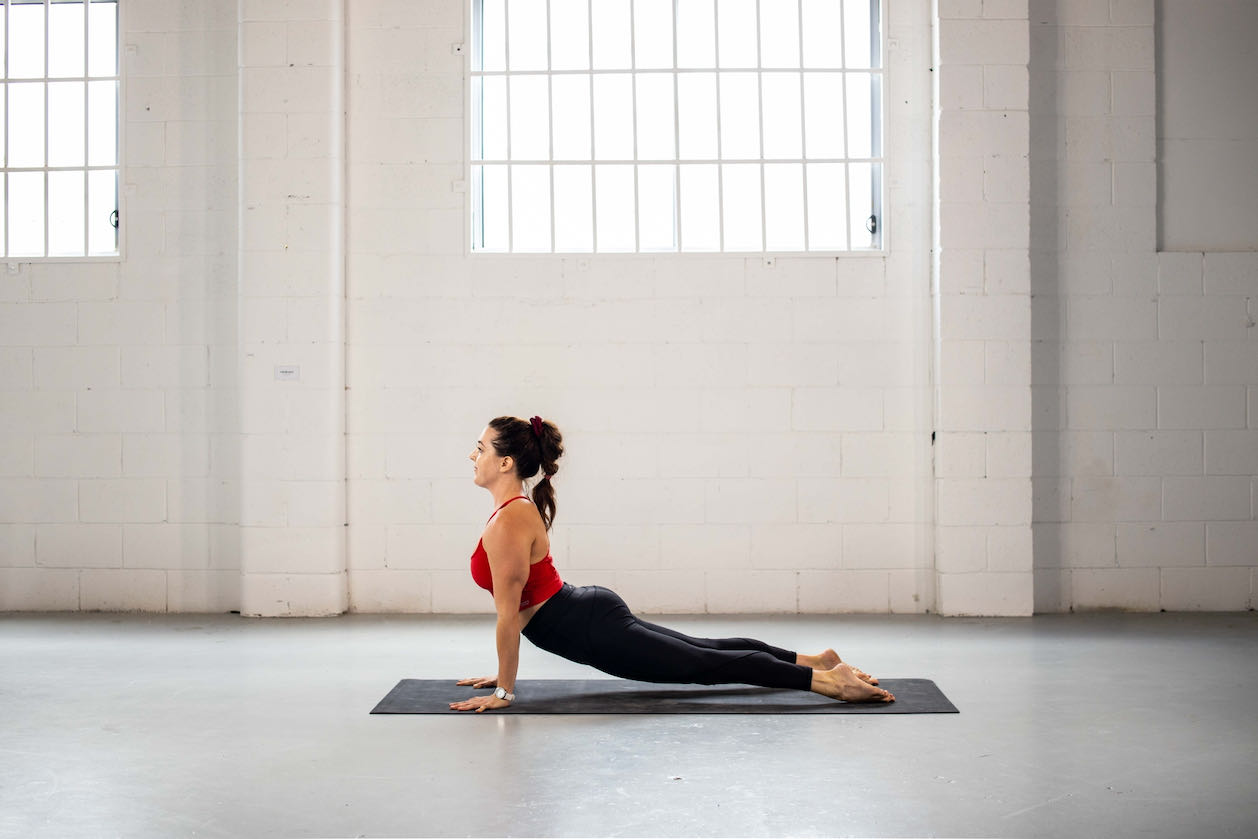
Some practitioners tend to roll their shoulders forward, putting a lot of strain on the whole arm, including the wrist and fingers. Try to avoid this, here’s how to set it up:
Lie flat on your stomach with your hands planted alongside your rib cage, elbows high.
Start to straighten your arms, at the same lift your chest through your shoulders, press your hands into the earth, do not lock out the elbow joint.
Toes are untucked, legs about hip width, squeeze your booty so your knees and thighs are off the ground.
High Plank Pose
Plank pose gives you all the benefits of strengthening your wrists, abs, arms, shoulders, back and glutes… especially when your body is in proper alignment (this is why we created the Foundation Program inside MerryBody, to ensure you know exactly how to do each pose! It really is a great place to begin your Yoga practice).
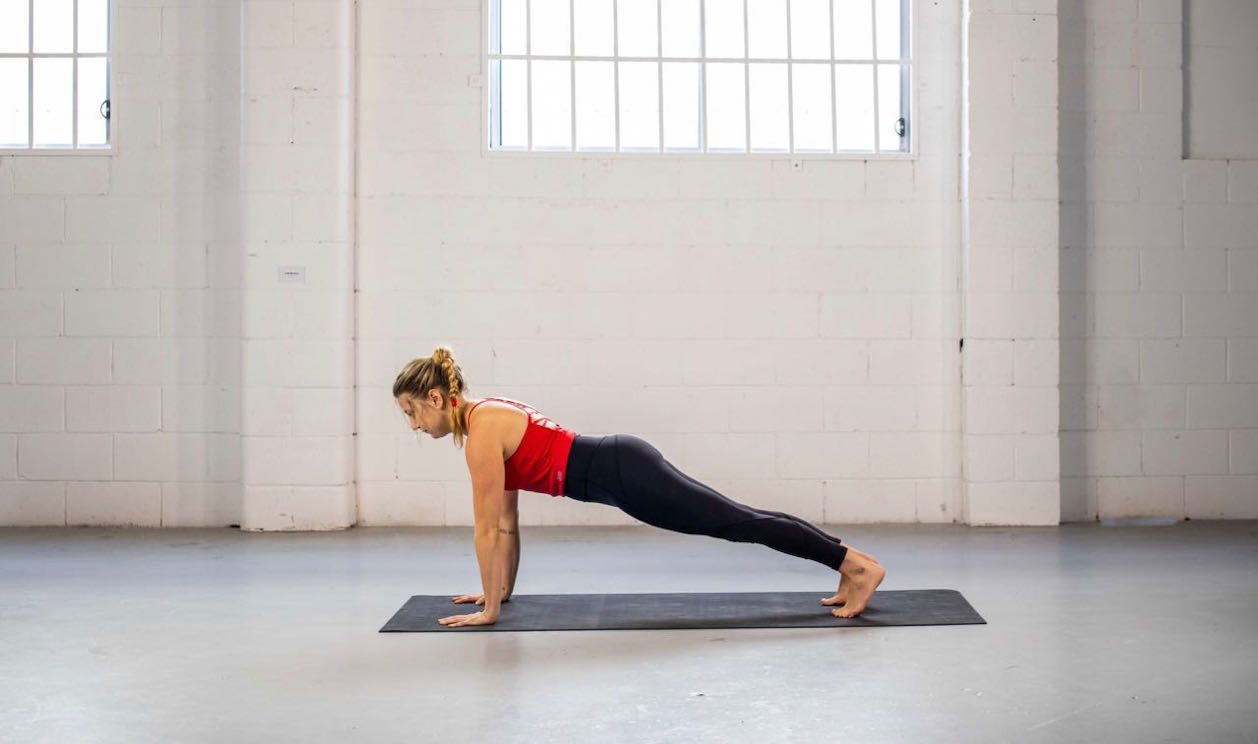
As you can see, it is a Yoga pose where the body is in a straight line from head to heels. You will bear weight in your hands, wrists, shoulders and feet.
To set it up, wrists are under the shoulders. The upper arms should be perpendicular to the floor, with elbows straight (keep a slight microbend) and hands flat on the ground, fingers spread.
The feet should be hip-width apart, toes tucked. There is one straight line from head to heels. Draw your core in, gently tuck the chin and breathe.
Hold for 5-10 breaths. Repeat 3 times.
Prayer Position (Anjali Mudra)
This is one of the best Yoga positions for your wrist mobility and really it is so easy.
Simply bring palm to palm at your heart’s space. You can add a bonus stretch by drawing the palms down lower and then back to your heart. Definition of Anjali Mudra here.
If you need, flip the hands so the back of the palms connect and fingers point down to counteract the stretch.
The thing is, you don’t realise how much you need and use your wrists until there is some kind of pain that limits your movement.
Just think, you need your wrists to drive, to carry the shopping, to write a letter, to stir the pot, to open the door… our wrists are very important!
So give them some care and attention to ensure they stay healthy for the rest of your life!
If you’d like to try out some Yoga classes but you’re not sure where to begin, we’d recommend checking out this 5 Day Program of Yoga and Pilates we have available for free.
It’s all on demand and online so you can do it from wherever you are and whenever you want.
Look forward to hearing how you go!
Always merrymaking,
Emma + Carla